Home > Knowledge Base >
Manage your checklist, assignments and due dates.
GET STARTED
Checklists can be accessed by the agent, transaction coordinator, and broker and are found within each transaction on the right side of the screen in the Transaction Features menu. Click on the checklist icon to “Assign” a checklist from your account’s existing list of checklist templates or select “Create new” checklist from Propy’s default checklist one.
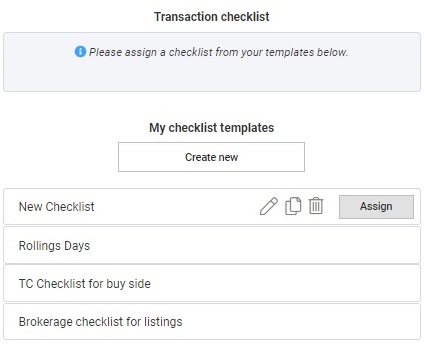
The checklist, once assigned, allows you to keep track of which documents have been uploaded and assigned, as well as which are awaiting signatures and by whom. You can optionally enter due dates to help you track each task and related documents.
Add the “Offer Acceptance Date”
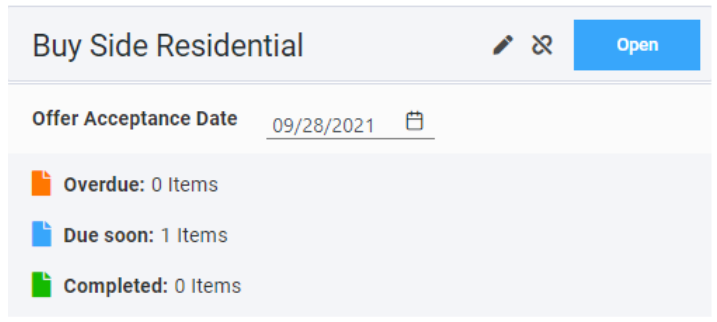
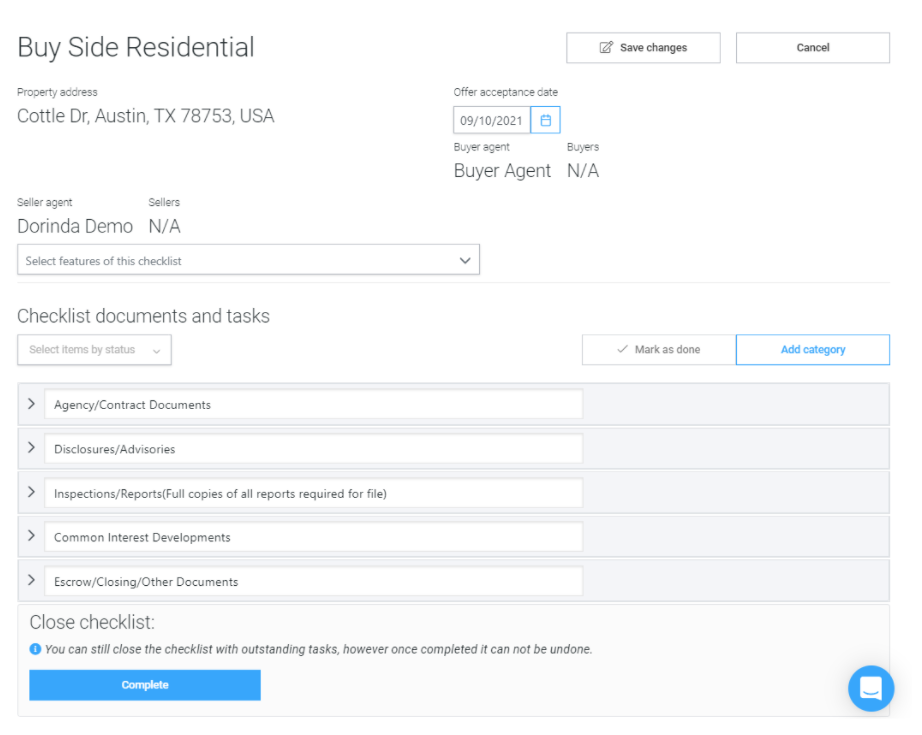
Edit Checklist
Click “Edit Checklist” to add, remove, or rename checklist categories, clicking the down arrow to open and edit steps within each category; edit document names, require and assign signatures, then click “Save changes.”
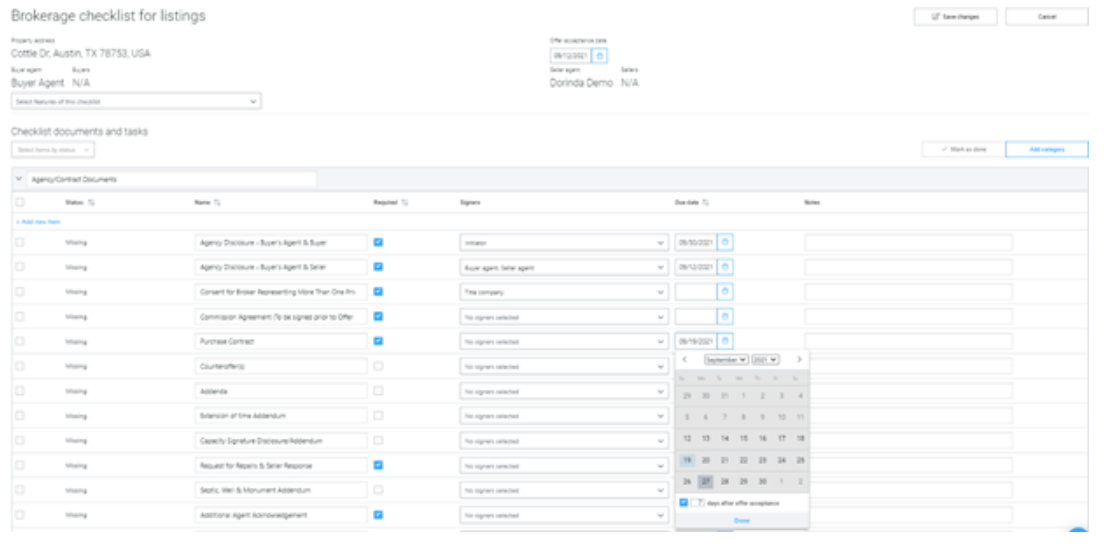
Adding Dates
To add dates, click on the calendar icon then choose either a fixed date or a rolling number of days from “Offer Acceptance Date.”
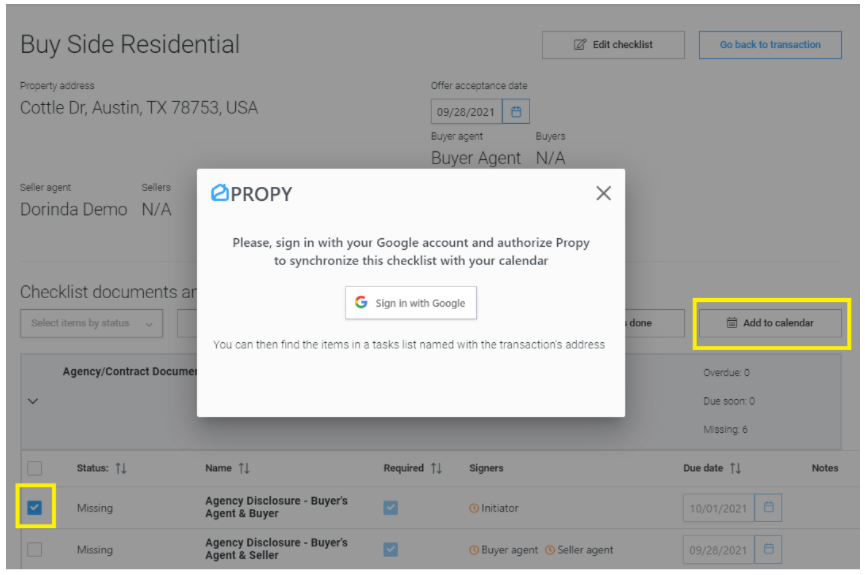
After you’ve assigned due dates to checklist items, you may wish to use the “Add to calendar” feature to import checklist task dates into your Google calendar with reminders of upcoming tasks.
You will need to allow Google to sync the checklist with your calendar only once.
MANAGE TRANSACTIONS
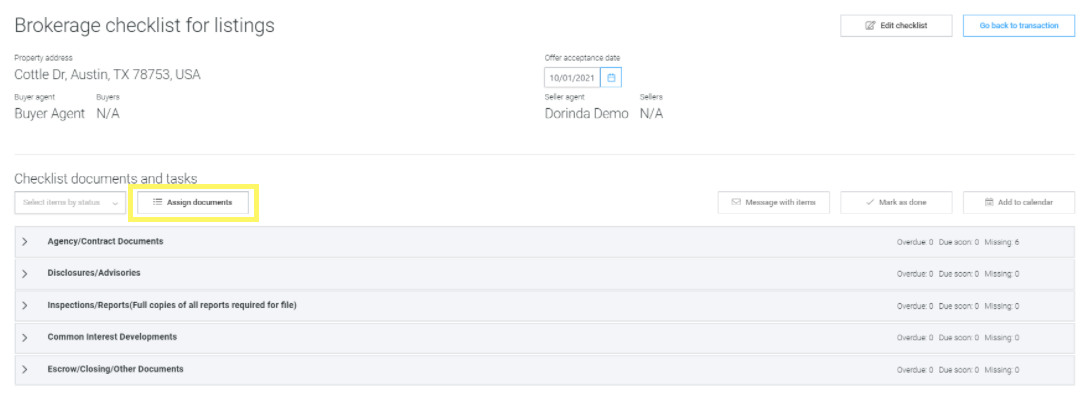
Documents can be assigned to the checklist either from the ”Assign Documents” button in the checklist or from the deal step.
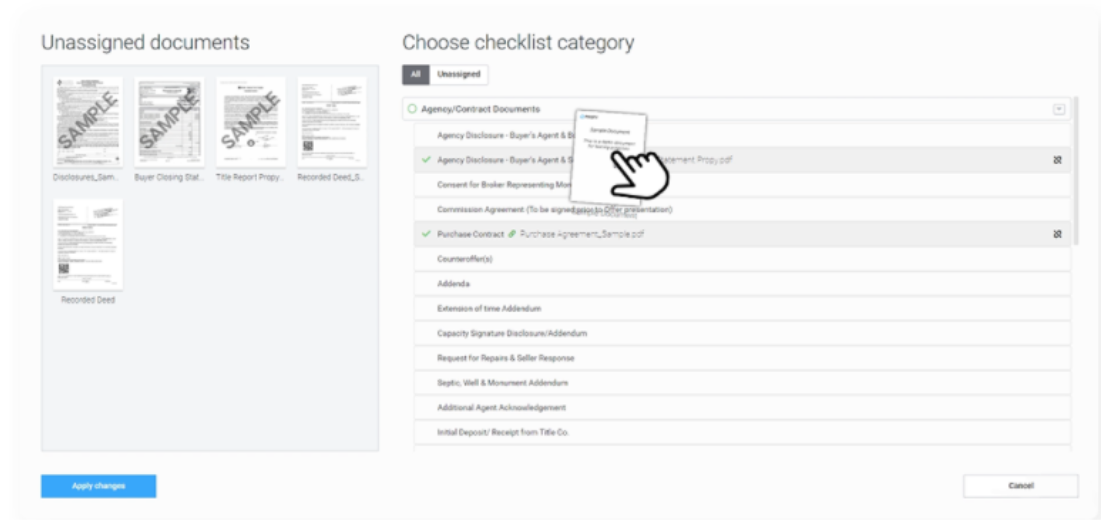
You can assign multiple documents to a checklist item by dragging and dropping them on top of it.
Work with the Checklist
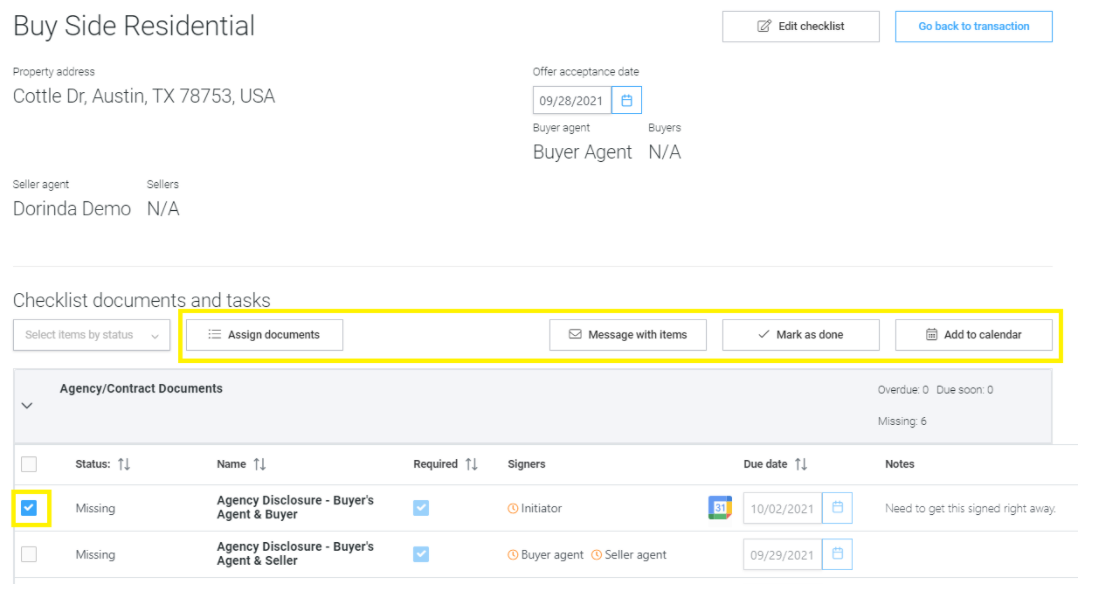
Work with the assigned checklist by selecting tasks/steps with the left-hand checkbox for options to:
“Assign Documents” – if you haven’t already through the “Storage” feature
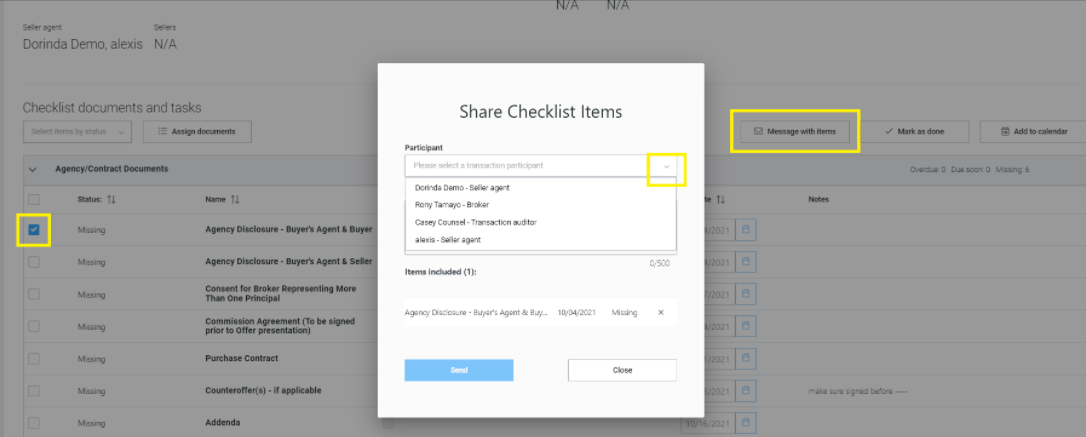
“Message with Items” to assign the checklist task to a deal participant.
“Mark as Done”
“Add to Calendar”
Share Checklist Task
Select the task with the left-hand checkbox, then click “Message with Task”
Add Tasks to Google Calendar
As mentioned above, select the option to “Add to calendar” to synch with your Google Calendar.
